Designing a user experience as a whole is a complicated, multi-step process and every designer has their own way to approach the problem.
Apart from concept generation and early testing( which is whole another topic that I’ll cover later), it helps to give you a reference point for the layout of a screen, page, or the whole flow of the application. It allows you to try out every possible idea before settling on one.
Sketching when done with the purpose of collaboration with the team helps in shared understanding and alignment from start to finish.
“A problem visualized is a problem halved.”
– Chris, Invision Design
Know your basics
- You don’t need to be an artist to do UX sketching. Master the basic shapes- Lines, circles, triangles, and squares.

- Add annotations and notes. Annotations are names placed close to an element to explain its content. For example an explanation of a picture, interaction involved, or anything that isn’t explained by your visual sketch.

“ Words + Visuals” is a powerful combination.
- UI Conventions: There are certain conventions for drawing UI elements, I’ve provided some below. But if you need more you can make your own set of the visual library using the basics. The goal is not to make things pretty, or to invest too much time but to come up with lots of ideas and show your thinking.

“Sketching is quick and easy and everyone can see what you mean.”
- Practice: Copy existing screens and layers, practice common icons. Establish a visual hierarchy and bring attention to important places by applying an additional color and by using thicker pens.
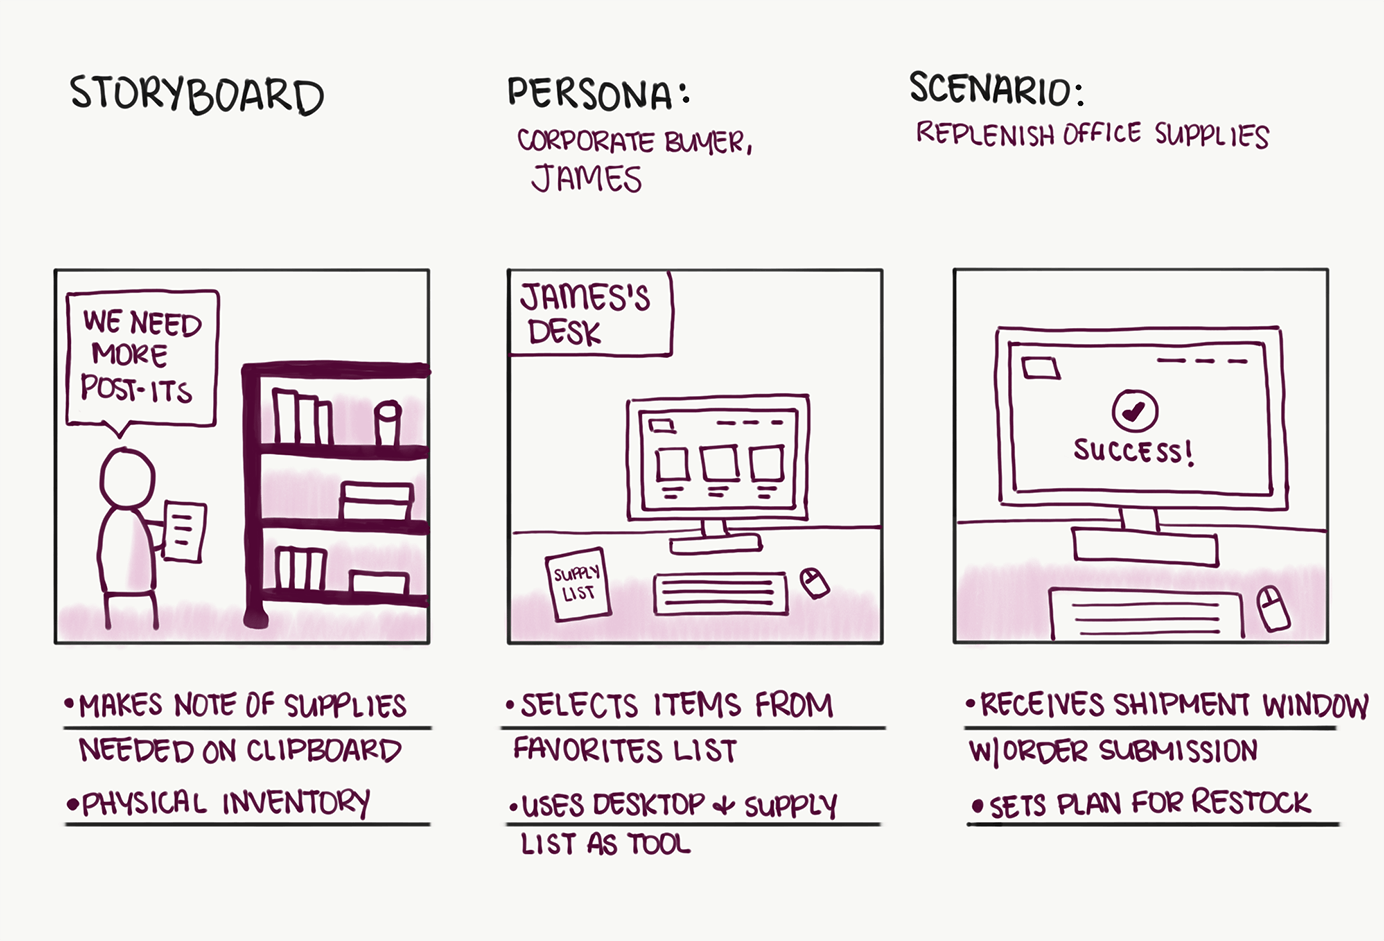
Early concept generation and communicating ideas in a team.
Once you know the problem sketching is perfect to generate ideas to quickly filter out the best ideas from bad ones.
- Split the team and have everyone create a solution within a stipulated time.
- Next, everyone presents their idea and their thinking process behind the solution.
- Take the best part from everyone’s solution and reiterate your idea.
- Go through the presentation and feedback again.
- Assign someone to draw out the collaborative effort by taking the best from all ideas.
In the end, you’ll have the best ideas from the whole group which can either be used for concept generation, storyboarding, prototyping the screens, and making information architecture. One big advantage is that you can get to user testing earlier and by reiterating based on user feedback, you can go to the final visuals with surety.