Introduction to this blog
- In this blog, we will cover the basics of React JS, with hands-on practice.
- We will try to learn how the basic Application of React works.
- Let’s begin without any further delay.
Deep Dive into React
First of all, let us understand what React JS is. Basically, it is a javascript library that helps us create a user interface with the help of components(User Interface Components).
React is free to use and is open-source maintained by Meta(Facebook)
Although it is a library, it is also called a framework and is widely compared with Angular and Node Js.
Without any doubt, React JS is one of the most popular Js Library or frameworks that are getting used all over the world.
Not only that it is widely recommended for single-page UI’s. Single-page means that the page will not be reloaded while moving from one page to another.
And no-refresh will occur on clicking of buttons or any other functionality, that is the beauty of this library.
The biggest advantage of this library is the decoupling of the components. It means that the header, footer, or body can be treated as an independent entity.
Why use React JS over Javascript?
Although all the functionality of React can be done using javascript alone, the main point is complexity and time.
It will take a lot of time and very complex coding to achieve what can be easily done using React JS.
Is because of all the complexity and to save time, React was developed.
The major advantages of React are-
- Component Reusability
- Single-Page application development
- SEO Friendly
- Data Binding to track the changes
- Cross-Platform Support
- More Flexible than other frameworks
- Custom Components are supported
- Fast Rendering
- Very Strong Community Support
Let’s begin with the code
Software requirements for React are-
- Node.js (Download link)
Once the node.js is installed you can check the version by-
node --version
npm --version
npx --version
These 3 commands will give you the versions of node, npm, and npx.
Node.js is an open-source, cross-platform, back-end JavaScript runtime environment that runs on the V8 engine and executes JavaScript code outside a web browser.
We are going to use it for executing our react app.
npm is basically a node package manager, if you are coming from a python background think of it like a pip.
NPX is node package executed, that is instead of installing the package on your local system it will execute it directly.
npm and npx are installed automatically with node, if the version is above 5.2.0
Let’s create our React application, for that let’s create a directory for the same and go there-
mkdir reactApps
cd reactApps
npx create-react-app first_app
From the above screenshot, we can see that there are also some naming conventions involved while creating the application like we cannot have capital letters in the App name.
Now our app is created.
Now, the catch is we have used npx rather than npm, that is because we will be creating our app only once, so why install create-react-app on our local system.
This is the reason why we have used npx rather than npm.
Let us now open our React app in the Visual Studio and see what it looks like.
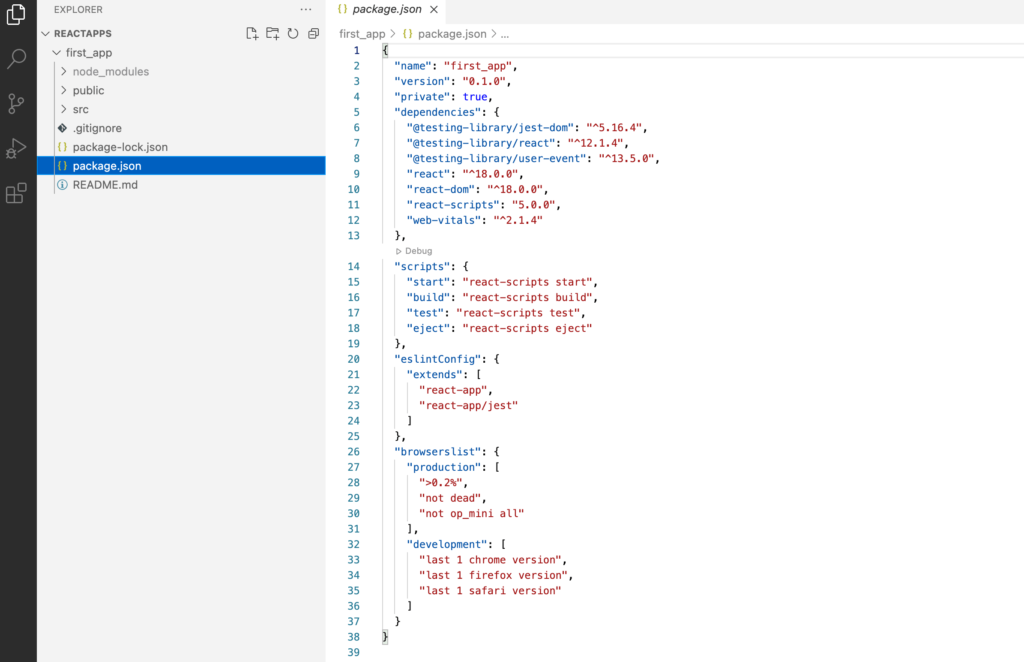
So, here we can see that it has already created a lot of files for us, such as gitignore, readme, and others. In the package.json we can find the versions of the packages installed.
Let’s talk about some of the files also-
The public folder has all the files that will be public, like favicon.ico, which is the icon that is displayed with the Title on the browser.
The src folder has all the source files, where we write our code.
In the public folder, we can find out index.html, this is the main code file of our app. This is the source code of our single-page application.
In the src folder, we can find out idex.js and app.js, they are used to develop our application with the code.
The entry point for our application is the index.js file.
Let’s take a look at the index.js file.
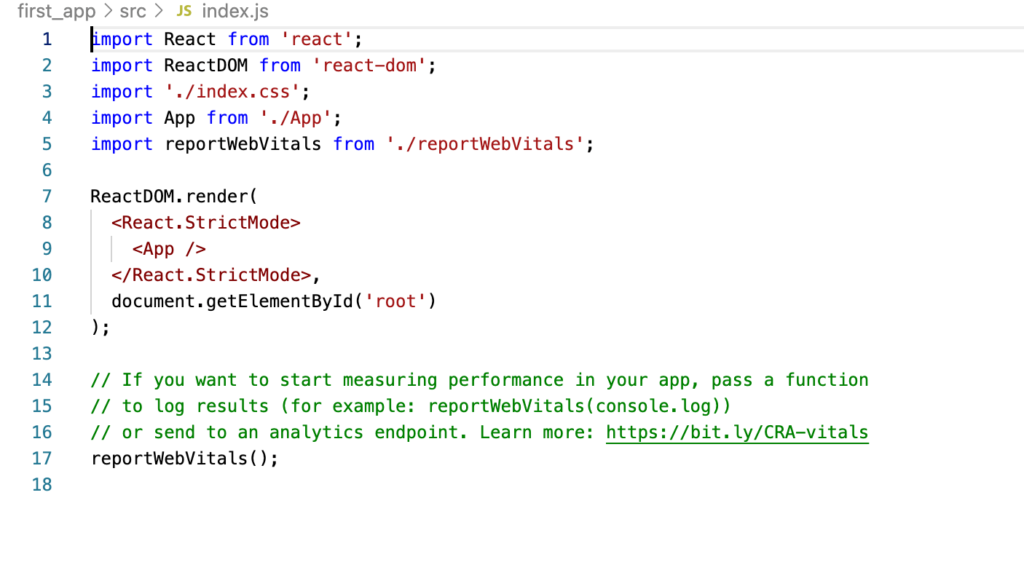
From lines 8 to 10 is our JSX(JavaScript Extension), having the component APP in it, which means it will go to the App component(App.js file).
Line 11 acts as a selector, that is which element is to be selected(root in the default app).
Let us move to App.js and see what it looks like.
Before that let us start our application and see what the default app looks like-
npm start


Here we can see that it is showing local and on your network, which means that the app is accessible on localhost on your system, while at this address over the same network.
The beauty of this is to allow you to access your app on different devices such as mobile and tabs, to see how the application is looking on different devices.
The only catch is the same network requirement for the devices.
Let’s take a look at App.js and see what is there.

Here we can see that the code is very similar to that of HTML, and it is very to understand what is getting displayed on the UI.
Most of the things are common to the HTML only the className is new here. className is similar to a class.
The only reason for not using a class here is because it is a keyword in Javascript.
Just make sure not to consider this code as HTML because it is JSX, both are quite similar but are separate languages.
This is what the basic app looks like in React, we will dive deeper into it, in our upcoming blogs, but before that let’s cover some more basics about React.
How to write JavaScript Code?
For writing our JavaScript code we can use { } curly brackets and write inside.
In the above example, we can see the logo has been used as a javascript variable.
Let’s try to add some strings and integers using javascript.


From the above example, we can see, how easy it is to add a JavaScript Code.
We can also declare a variable and use it using the let keyword. Just make sure you have defined it before the return statement.
Props the function arguments
Props are basically the arguments that are sent into the components as an object (JSON).
import logo from './logo.svg';
import './App.css';

import React from 'react';
import ReactDOM from 'react-dom';

function Name(props) {
  return <h2>{ props.name } has login</h2>;
}

function User() {
  return (
    <>
	    <h1>What is the name of the user login?</h1>
	    <Name name="Captain" />
    </>
  );
}

ReactDOM.render(<User />, document.getElementById('root'));
export default User;
This is how props work. In our App.py file, we have made these changes.
Let us see the output for the same.

And here it is, right on our screens.
Conclusion
In this blog, we have covered the importance of React, with the hands on practice.
In our upcoming blog, we will try to make a to-do list app using React only.
Feature Image credit- Utkarsh Shukla Photography
Still Curious? Visit my website to know more!
For more interesting Blogs Visit- Utkarsh Shukla Author
Thanks for reading, Ba-Bye for now.