


Node-RED
Introduction
- Node-RED is a very powerful and easy-to-use web-based open-source editor that is used to make connections and communications between different systems possible.
- Any devices such as IO, IoT, or IIoT can be connected easily through Node-RED and we can also connect API’S, Cloud-based systems and databases, and make any combinations between them as one can imagine.
- Projects in Node-RED consist of nodes connected through wires (i.e. virtual wires) where each node output corresponds as an input to another node.
- Node-RED is built on node.js, and it provides a very easy-to-use javascript editor to create our functions and do the analytics and modify the data according to our needs.
- Node-RED is programmable on most of the systems that include- macOS, Windows, Linux, raspberry pie, and much more.
- Node-RED provides a one-click deployment over the server, which makes it very easy to deploy the code.
Nodes
- Nodes are the functions or processes that are used to create a workflow in Node-RED.
- Nodes can use pre-defined functionalities or we can define our functions in them.
- Nodes can be triggered by any external events, timer, receiving output from previous nodes, HTTP requests, any pre-defined events, or manually also.
- By default many nodes are pre-defined and we can easily use them by just clicking on them, there are n number of nodes that can be used with just one click
- If we want to use some external nodes that are not provided then we can easily import them into our project.
- There is a configured node that can be shared among different nodes for sharing a common configuration.
- Debug Node is provided for debugging the flow.
- Input Nodes have a small icon on the right while the output node has on the left, defining the type of action the node takes.
Flows And Wires
- Flow is a set of nodes connected using wires.
- Wires are the strings that connect two or more nodes and how the message will be conveyed.
- Different flows can be interconnected with each other.
Demo
Installation (for mac only)
- Node is a pre-requisite for running Node-RED, so firstly we will install node, we can directly install node from node.js official site or with the help of brew also, the command for brew is-
- brew install node
- The command for installing Node-RED
- sudo npm install -g –unsafe-perm node-red
- Command to run Node-RED locally
- node-red
- If everything works fine then this will be printed in console-
- 18 Jul 14:21:21 – [info] Server now running at http://127.0.0.1:1880/
- 18 Jul 14:21:21 – [info] Starting flows
- 18 Jul 14:21:21 – [info] Started flows
- On opening http://127.0.0.1:1880/
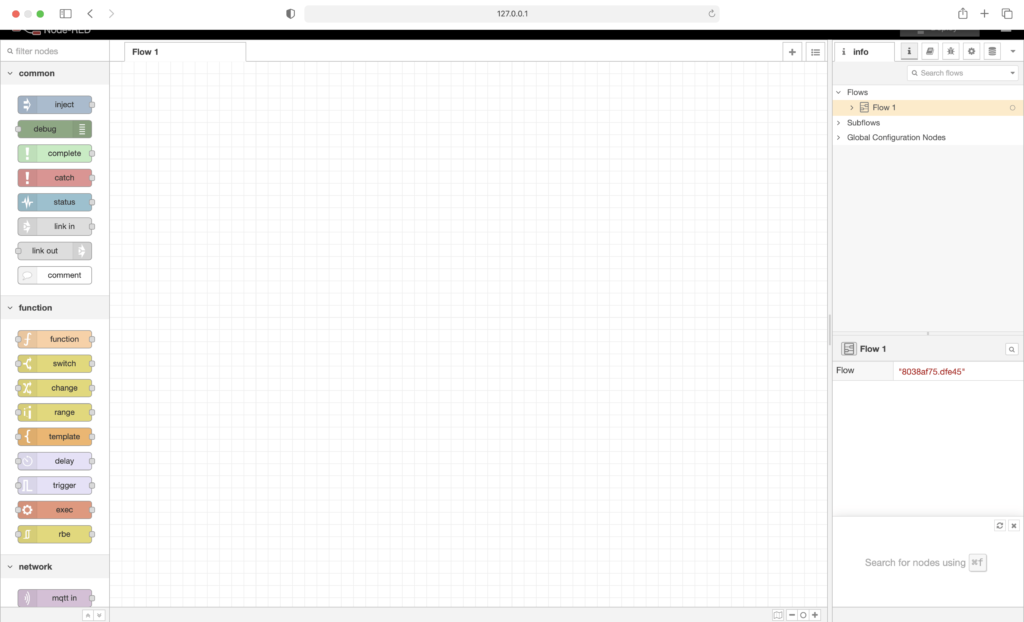
On the left side of the image we can see the nodes while on the right we have debug, deploy, help ,config and other infos.
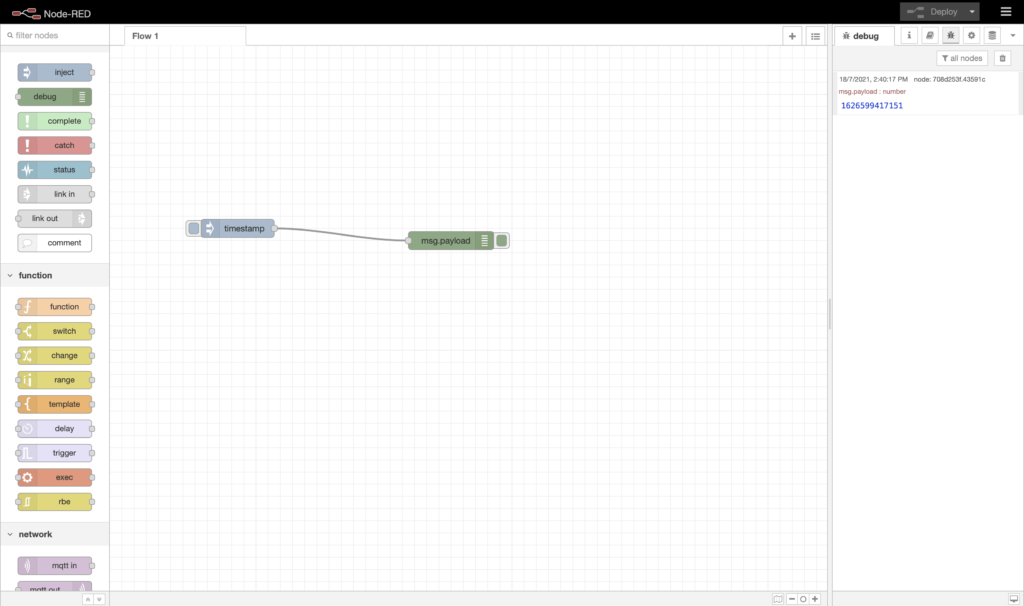
Creating a flow
- We will create a simple flow that will publish the current timestamp.
- Drag and drop the inject node and the debug node from the nodes options available on the left side of the screen.
- Connect both the nodes, i.e. connect inject node with debug node using wires.
- By default timestamp is provided in the inject node by node-red
- Click on the deploy button, then click on the left side of the inject node.
- On the debug window on the right side of the screen you will be able to see the current timestamp.
- These two nodes connected with a wire is known as a flow.
References-
- https://nodered.org/docs/getting-started/
Still Curious? Visit my website to know more!
For more interesting Blogs Visit- Utkarsh Shukla Author
0 Comments


Add Comment
You must be logged in to post a comment.